How To Easily Connect a Router to a Modem Wirelessly: Expert Tips
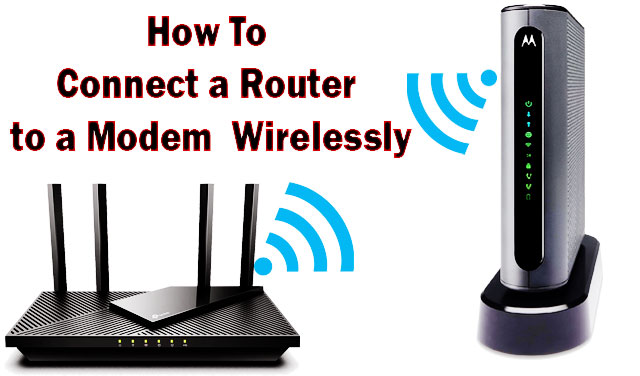
To connect a router to a modem wirelessly, simply plug in the router and modem, then follow the router’s setup instructions for connecting to a wireless network. Are you looking for a convenient way to connect your router to a modem wirelessly?
Look no further! We will provide you with a simple and straightforward guide on how to get your router and modem wirelessly connected. By following a few easy steps, you’ll be able to enjoy a seamless internet connection throughout your home or office.
So, let’s dive right in and discover how you can connect your router to a modem wirelessly without any hassle.
Introduction To Wireless Router Setup
Connect your modem and router wirelessly with this comprehensive guide on wireless router setup. Learn how to easily set up your wireless network for seamless internet connectivity.
Setting Up Your Wireless Router: A Step-By-Step Guide
So, you’ve just purchased a brand new wireless router and you can’t wait to get it set up and connected to your modem. The good news is that with a few simple steps, you’ll be enjoying a seamless wireless internet connection in no time.
In this guide, we’ll walk you through the process of connecting your router to your modem wirelessly. Let’s get started!
Requirements For Wireless Router Setup:
To successfully set up your wireless router, you’ll need a few things on hand:
- A wireless router: This is the device that will transmit the wireless signal to your devices.
- A modem: This is the device that connects to your internet service provider (ISP) and brings the internet into your home.
- An Ethernet cable: This cable will be used to connect your router to your modem during the initial setup process.
- A computer or mobile device: You’ll need a device to access the router’s setup interface and configure the wireless settings.
Step 1: Positioning Your Router:
Before you begin the setup process, it’s crucial to find an optimal location for your router. Here are a few things to consider:
- Place it in a central location: Position your router in a central area of your home to ensure a strong and consistent wireless signal throughout.
- Avoid obstructions: Keep the router away from walls, large appliances, or any other objects that may interfere with the wireless signal.
- Elevate it if possible: If you have multiple floors in your home, consider placing the router on a higher level to maximize coverage.
Step 2: Connecting The Router To The Modem:
Now that your router is in place, let’s move on to connecting it to the modem wirelessly. Follow these steps:
- Power off your modem: Before connecting the router, make sure to power off your modem by unplugging it from the power source.
- Connect the router to the modem: Use an Ethernet cable to connect the LAN (Ethernet) port on the back of your router to the LAN port on your modem.
- Power on the modem: Plug in the modem and wait for it to fully power on. This may take a few minutes, so be patient.
- Power on the router: Once the modem is powered on, plug in your router and wait for it to fully power on as well.
Step 3: Accessing The Router’s Setup Interface:
To configure your wireless settings, you’ll need to access your router’s setup interface. Here’s how:
- Open a web browser: On your computer or mobile device, open a web browser such as Google Chrome or Safari.
- Enter the router’s IP address: In the address bar of the web browser, type in the IP address of your router. This information can usually be found in the router’s manual or on the manufacturer’s website.
- Log in to the router’s interface: You’ll be prompted to enter a username and password to access the router’s setup interface. Again, refer to the router’s manual for the default credentials or any customized login information you have set up.
Step 4: Configuring Wireless Settings:
Now that you’re in the router’s setup interface, it’s time to configure your wireless settings. Here’s what you need to do:
- Choose a network name (SSID): This is the name that will be displayed when you search for available wireless networks. Choose something unique that you can easily identify.
- Set a secure password: Create a strong password to protect your wireless network from unauthorized access. Make sure it’s a combination of letters, numbers, and symbols.
- Select a wireless encryption type: Choose the highest level of encryption available, such as WPA2, to ensure the security of your wireless network.
Step 5: Connecting Devices To Your Wireless Network:
With your wireless settings configured, it’s time to connect your devices to your newly set up wireless network. Here’s how:
- On your device, go to the Wi-Fi settings menu: This can usually be found in the settings app or control panel.
- Look for your network name (SSID): Locate your network name in the list of available networks and select it.
- Enter the password: When prompted, enter the password you set up during the configuration process.
- Wait for the connection: Once you’ve entered the correct password, your device will connect to the wireless network.
And there you have it! Your wireless router is now connected to your modem wirelessly, and your devices are connected to your wireless network. Enjoy the freedom of a wireless internet connection throughout your home!
Gather Required Equipment
To connect a router to a modem wirelessly, gather the necessary equipment, including a router, modem, ethernet cable, and power cords. Ensure all devices are in close proximity for a strong wireless connection.
To set up a wireless connection between your router and modem, you will need the following equipment:
- Router: Ensure that you have a wireless router capable of connecting to your modem wirelessly. Check the specifications or consult the product manual if necessary.
- Modem: Make sure you have a compatible modem that can establish a wired connection to your internet service provider (ISP).
- Ethernet cable: You will need an Ethernet cable to connect your modem to the router during the initial setup process.
- Power cables: Ensure you have the necessary power cables for both your router and modem.
- Computer or device: You will need a computer or device with Wi-Fi capabilities to configure the wireless settings on your router.
Now that you have gathered the required equipment, let’s move on to the next step of the setup process.
Choosing A Suitable Location
Discover the perfect location for your wireless router to connect seamlessly to your modem. Follow these easy steps to set up a wireless connection and enjoy uninterrupted internet access.
When setting up a wireless router to connect to your modem, choosing the right location for your router is crucial. The location can greatly affect the wireless signal strength and coverage in your home or office. Here are some important factors to consider when selecting a suitable location for your router:
- Central Position: Place the router in a central location within your home or office. This will help distribute the wireless signal evenly throughout the space, minimizing dead zones and ensuring a strong connection in all areas.
- Avoid Obstructions: Keep your router away from obstructions such as walls, furniture, and appliances. These physical barriers can weaken the wireless signal and reduce its range. Find an open space where the router’s signal can travel freely without obstruction.
- Elevated Placement: For optimal coverage, consider placing the router at an elevated position, such as on a shelf or mounted on a wall. This can help improve the router’s signal propagation and reach devices located on different floors or in separate rooms.
- Away from Interference: Keep the router away from devices and equipment that may interfere with the wireless signal. Examples include cordless phones, microwave ovens, baby monitors, and Bluetooth devices. These can introduce signal interference and degrade the network performance.
- Check Signal Strength: During the initial setup, use the router’s signal strength indicator to determine the best location. Walk around your home or office with a device connected to the router, such as a laptop or smartphone, and observe the signal strength in different areas. Aim for a location with a consistently strong signal.
- Consider External Antennas: If your router has external antennas, you can adjust them to improve signal strength and coverage. Experiment with different antenna positions, such as pointing them in different directions or adjusting their angles, to find the best setup for your specific environment.
Remember, the location of your router plays a significant role in the quality and reliability of your wireless network. By considering these factors and choosing a suitable location, you can ensure a stable and efficient connection throughout your home or office.
Powering Up The Router
To connect your router to a modem wirelessly, follow these simple steps for a seamless setup and improved internet experience. Establish a connection between your modem and router, access the router’s settings, enter the wireless network information, and connect your devices to enjoy wireless internet connectivity.
Setting Up Your Router: A Smooth Wireless Connection
In order to establish a wireless connection between your router and modem, there are a few simple steps you need to follow to ensure a smooth setup process. Powering up the router correctly is the first crucial step in this process.
Let’s dive in!
To power up your router, follow these steps:
- Locate the power adapter that came with your router.
- Plug one end of the power adapter into the designated power port on the back of the router.
- Insert the other end of the power adapter into a working electrical outlet.
- Switch on the router’s power button, usually located near the power port.
- Wait for a few moments to allow the router to initialize and boot up.
By following these steps, you’ll successfully power up your router and get ready to establish a wireless connection with your modem.
Now, let’s move on to the next step and start configuring your router for a wireless connection.
Accessing Router Settings
Learn how to easily access the settings of your router and connect it wirelessly to a modem. Follow these simple steps to ensure a seamless connection between your devices.
When it comes to connecting a router to a modem wirelessly, accessing the router settings is a crucial step. This allows you to configure and personalize your network according to your needs. In this section, we will guide you on how to access your router settings easily.
Steps To Access Router Settings:
- Connect to your router: Ensure that your computer or device is connected to the router’s network. You can do this by either connecting to the wireless network or plugging an Ethernet cable from your device to the router.
- Open a web browser: Launch your preferred web browser, such as Google Chrome or Mozilla Firefox.
- Enter the default IP address: In the browser’s address bar, type the default IP address for your router. Common default addresses include 192.168.0.1 or 192.168.1.1. Press Enter to proceed.
- Provide login credentials: You will be prompted to enter your router’s login credentials. These details are typically found on the router itself or in the user manual. Enter the username and password to access the router settings page. If you haven’t changed the default login credentials, try using “admin” for both the username and password.
- Explore the router settings: Once logged in, you will have access to a wide range of settings and options. Take the time to navigate through the different tabs and menus to familiarize yourself with the available features.
- Configure wireless settings: To ensure a secure and efficient wireless network, navigate to the wireless settings section. Here, you can change the network name (SSID), select a suitable security protocol (such as WPA2), and set a strong password to prevent unauthorized access.
- Enable parental controls: If you have children or want to restrict certain websites or applications, consider enabling parental controls. This feature allows you to block specific content or set time limits for internet usage.
- Set up port forwarding: If you require specific applications or devices to have access to certain ports on your network, port forwarding is essential. Utilize the port forwarding settings to redirect incoming connections to the appropriate devices.
- Update firmware: Regularly check for firmware updates in the router settings page. Firmware updates often improve the router’s performance, security, and functionality.
- Save and apply changes: After making any desired modifications, remember to save and apply the changes. Take note that some routers may require a reboot for the changes to take effect.
By following these steps, you can easily access your router settings and configure your wireless network to suit your needs. Enjoy a seamless browsing experience and ensure the security and reliability of your network.
Configuring Wireless Settings
Looking to connect your router to a modem wirelessly? Learn how to configure your wireless settings for seamless connectivity without any hassle. Easily establish a wireless connection between your router and modem for convenient internet access at home.
Connecting a router to a modem wirelessly can give you the freedom to access the internet from any corner of your home. Configuring the wireless settings correctly is crucial for establishing a secure and reliable connection. In this section, we will explore the necessary steps to configure the wireless settings on your router effectively.
Accessing The Router Interface:
To configure the wireless settings, you need to access the router’s web interface. Follow these steps:
- Connect your computer to the router using an Ethernet cable or through Wi-Fi.
- Open a web browser and enter the default IP address of your router in the address bar.
- You will be prompted to enter the router’s username and password. Refer to the user manual or the manufacturer’s website for the default credentials.
Enabling Wi-Fi And Changing Ssid:
The Service Set Identifier (SSID) is the name of your wireless network. To change the SSID and enable Wi-Fi, follow these steps:
- Login to the router’s web interface and navigate to the wireless settings page.
- Locate the option to enable Wi-Fi and toggle it on.
- Enter a unique and easily identifiable name for your network in the SSID field.
- Avoid using personal information or easily guessable names for security reasons.
Setting A Strong Wi-Fi Password:
A strong Wi-Fi password is essential to prevent unauthorized access to your network. Follow these steps to set a strong password:
- Go to the wireless security settings page in the router’s interface.
- Select the appropriate encryption type, such as WPA2-PSK, for enhanced security.
- Create a password that combines uppercase and lowercase letters, numbers, and special characters.
- Aim for a minimum of 12 characters to increase the complexity and strength of the password.
Choosing The Appropriate Wireless Channel:
Wireless routers operate on different channels to minimize interference from neighboring networks. Follow these steps to select the appropriate wireless channel:
- Access the wireless channel settings in the router’s web interface.
- Choose the “Auto” option if available, allowing the router to automatically detect and adjust to the least congested channel.
- If the auto option is not available, use a Wi-Fi analyzer tool to identify the least crowded channel in your area.
- Manually set the router to that channel to optimize the wireless performance.
Adjusting The Wireless Transmission Power:
The transmission power of the router determines the range of your wireless network. Follow these steps to adjust the transmission power:
- Navigate to the advanced settings section in the router’s web interface.
- Locate the transmission power settings.
- Reduce the transmission power if you have a small living space to avoid unnecessary signal leakage and interference.
- Increase the transmission power if you have a large home or need to cover a wider area.
With the wireless settings configured properly, you can now enjoy a secure and reliable wireless connection throughout your home. Remember to save the changes made in the router’s interface to ensure that the configurations take effect. Keep in mind that periodically reviewing and updating your wireless settings can help maintain optimal performance and security.
Wireless Security Setup
Setting up wireless security for your router and modem connection can be done easily and securely, ensuring your network remains protected from unauthorized access. Here’s a step-by-step guide on how to connect a router to a modem wirelessly while maintaining a safe and secure network environment.
Wireless routers provide convenience and flexibility, allowing you to connect multiple devices to the internet without the hassle of cables. However, it’s important to ensure that your wireless network is secure to protect your personal information and prevent unauthorized access.
Follow these steps to set up wireless security for your router:
- Change the default admin username and password:
- Access your router’s settings by typing its IP address in a web browser.
- Navigate to the admin settings and change the default login credentials.
- Choose a strong, unique password to prevent unauthorized access.
- Enable network encryption:
- Open your router’s settings and navigate to the wireless settings.
- Look for options related to encryption or security mode.
- Select WPA2-PSK (AES) as the encryption method, which is the most secure option.
- Set a unique SSID (network name):
- In your router’s wireless settings, locate the SSID field.
- Avoid using default or generic names that can be easily guessed.
- Create a unique network name that doesn’t reveal personal information.
- Enable MAC address filtering:
- Find the MAC address filtering option in your router’s settings.
- Enable this feature to restrict network access to specific devices.
- Add the MAC addresses of trusted devices to the allowed list.
- Disable SSID broadcasting:
- In the wireless settings, look for an option to hide the SSID.
- Disabling SSID broadcasting makes your network less visible to potential attackers.
- While this won’t completely secure your network, it adds an extra layer of protection.
- Regularly update firmware:
- Visit the manufacturer’s website to check for firmware updates for your router model.
- Keeping your router’s firmware up to date ensures you have the latest security patches.
Remember, wireless security is an ongoing process. Regularly review and update your security settings to stay protected against evolving threats. By following these steps, you can create a secure wireless network that gives you peace of mind while surfing the internet.
Connecting To The Modem Wirelessly
Learn how to connect your router to a modem wirelessly without any hassle. Follow these simple steps to establish a wireless connection for a seamless internet experience at home.
Connecting your router to a modem wirelessly is a convenient and efficient way to access the internet without dealing with messy cables. In this section, we will explore the steps you need to follow to connect your router to a modem wirelessly.
First, make sure you have these items ready:
- Router and modem: Check that both devices are functioning properly and turned on.
- Ethernet cable: You will need this to initially connect the modem and router.
- Power adapter: Ensure that you have the necessary power adapters for both the modem and router.
Now, let’s dive into the process of connecting your router to the modem wirelessly:
- Access your router configuration page: Open a web browser on your computer and enter the default IP address of your router, which is usually mentioned in the user manual or on the back of the router. This will take you to the router’s configuration page.
- Enter login credentials: To access the configuration settings, you will need to enter your router’s login credentials. The default username and password are often mentioned in the user manual or on the router itself. However, it is highly recommended to change them for security purposes.
- Set up wireless settings: Look for the wireless settings tab or menu in the router’s configuration page. Here, you can configure the wireless network name (SSID) and password. Create a unique and strong password to protect your network from unauthorized access.
- Connect the router to the modem: Use an Ethernet cable to connect the router and modem. Plug one end of the cable into the WAN or internet port on the router and the other end into the modem’s Ethernet port. This initial connection will ensure that your router can establish a wireless connection with the modem.
- Power up the devices: Connect the power adapters to both the modem and router, and then plug them into power outlets. Wait for the devices to power up and establish a stable connection.
- Verify the connection: Once the router and modem are powered on, wait for a few minutes for them to establish a connection. You can check the status lights on both devices. If the lights indicate a successful connection, your router is now wirelessly connected to the modem.
- Connect your devices: After the router and modem are connected, you can connect your devices, such as laptops, smartphones, or smart TVs, to the wireless network. Look for the wireless network name (SSID) that you configured earlier and enter the password when prompted.
Congratulations! You have successfully connected your router to the modem wirelessly. Enjoy your wireless internet connection without the hassle of cables.
Remember to keep your router and modem firmware updated regularly to ensure optimal performance and security.
Checking The Internet Connection
To connect a router to a modem wirelessly, follow these steps to ensure a stable internet connection. First, power on the modem and router. Then, locate the wireless settings on the router and connect it to the modem. Finally, test the internet connection to ensure everything is working properly.
How To Connect A Router To A Modem Wirelessly
So, you just got a new wireless router and you’re eager to connect it to your modem. Connecting a router to a modem wirelessly can provide greater flexibility in terms of device placement and mobility. In this post, we’ll walk you through the process step-by-step, starting with checking your internet connection.
Before you start with the setup process, it’s crucial to ensure that your internet connection is working properly. Here are a few things you can do to verify the connection:
- Check the modem: Make sure that your modem is powered on and that all the necessary cables are securely connected.
- Test connectivity: Connect your computer or mobile device directly to the modem using an Ethernet cable. Open a web browser and try to access a website. This will help confirm that your internet connection is up and running.
- Restart the modem: If you’re still facing connection issues, try restarting your modem. Simply unplug the power cable, wait for a few seconds, and then plug it back in. Give it some time to reconnect and then try accessing the internet again.
By performing these steps, you can ensure that your internet connection is stable and functioning properly before moving on to the wireless router setup.
Configuring The Router Settings
Once you’ve confirmed that your internet connection is working, it’s time to configure the router settings. Follow these steps:
- Connect the router to the modem: Use an Ethernet cable to connect the router’s WAN or internet port to the modem. This will establish a connection between the two devices.
- Power on the router: Plug the router into a power source and turn it on. Wait for the router to boot up completely.
- Access the router’s settings: Open a web browser on your connected device and type in the default IP address of the router. This information can usually be found in the router’s manual or documentation. You will then be prompted to enter the router’s username and password.
- Set up the wireless network: Once you’re in the router’s settings, navigate to the wireless section. Here, you can customize various settings such as the network name (SSID) and security options. Make sure to choose a unique and secure password to protect your network from unauthorized access.
- Save the settings: After making the necessary configurations, don’t forget to save the settings. This will apply the changes you’ve made and allow the router to set up the wireless network.
Congratulations! You have successfully connected your router to the modem wirelessly. Now, you can enjoy the freedom of a wireless network and connect multiple devices seamlessly.
Remember, each router model may have slightly different setup steps, so it’s essential to refer to the user manual provided by the manufacturer. By following these instructions, you’ll be able to establish a secure and reliable wireless network in no time.
Testing The Wireless Network
Looking to connect your router to a modem wirelessly? Learn how to test the wireless network to ensure a strong and reliable connection. Avoid the hassle of tangled cables and enjoy seamless internet access throughout your home or office.
When you have successfully connected your router to the modem wirelessly, it is crucial to test the network to ensure everything is functioning properly. Here are a few ways to test the wireless network:
- Connect a device: Start by connecting a device, such as a laptop or smartphone, to the wireless network. This will allow you to check if the network is broadcasting and if you can establish a connection.
- Check signal strength: Move around your home or office and check the signal strength on your connected device. This will help you identify any weak spots or dead zones where the signal may be lacking.
- Test internet speed: Use an internet speed testing tool to measure the speed of your wireless connection. This will give you an idea of how fast your network is performing and if there are any issues that need to be addressed.
- Perform a ping test: Open the command prompt on your connected device and run a ping test to check the latency of your network. This will help you determine if there is any packet loss or high latency that may affect your online activities.
- Check for interference: Scan for any neighboring Wi-Fi networks or devices that may be causing interference with your network. If you find any conflicting channels, you can change your router’s channel settings to reduce interference.
- Test network stability: Keep your device connected to the network for an extended period and monitor if the connection remains stable. Look for any drops in connection or performance issues that may need troubleshooting.
By testing your wireless network, you can ensure that it is reliable, secure, and meeting your needs. It allows you to identify any potential issues and address them promptly, ensuring a smooth and seamless wireless experience.
Adding Devices To The Network
Learn how to wirelessly connect your router to a modem and add devices to your network effortlessly. No more hassle with cables and cords, simply follow our step-by-step guide for seamless connectivity.
Once you have successfully connected your router to the modem wirelessly, the next step is to add devices to your network. By doing so, you can enjoy seamless internet connectivity across all your devices. Here are the steps to add devices to your network:
- Connect the device to the Wi-Fi network:
- On your device, go to the Wi-Fi settings and select the name of your network.
- Enter the network password if prompted and click on “Connect” to join the network.
- Troubleshoot connectivity issues:
- If you encounter any issues with connecting to the network, try these troubleshooting steps:
- Make sure the device is within range of the router.
- Restart both the device and the router.
- Double-check the network password and ensure it is entered correctly.
- Update the device’s Wi-Fi drivers if necessary.
- Secure your network:
- To enhance the security of your network, consider implementing the following measures:
- Change the default Wi-Fi network name (SSID) and password to something unique.
- Enable network encryption such as WPA2 to protect your data from unauthorized access.
- Disable the Wi-Fi Protected Setup (WPS) feature, as it can be susceptible to security breaches.
- Prioritize devices:
- If you have multiple devices connected to the network, you can prioritize certain devices to ensure they receive faster speeds. This can be useful for devices that require high bandwidth, such as gaming consoles or smart TVs.
- Access your router’s settings page and look for the Quality of Service (QoS) feature. From there, you can prioritize specific devices by assigning them higher priority levels.
- Set up guest networks:
- If you frequently have guests or visitors who need temporary access to your network, consider setting up a guest network. This allows them to connect without having access to your main network and its shared resources.
- Check your router’s settings for the option to create a guest network. Configure the network name, password, and any other desired restrictions for guest access.
- Monitor connected devices:
- It’s important to keep an eye on the devices connected to your network, especially if you suspect unauthorized access. Most routers provide a device list that shows all connected devices.
- Regularly review the device list and remove any unfamiliar or unauthorized devices to ensure the security of your network.
Adding devices to your network is a straightforward process that helps you make the most of your wireless router. By following the steps outlined above, you can enjoy seamless internet connectivity across all your devices.
Troubleshooting Tips
Learn how to connect your router to a modem wirelessly with these troubleshooting tips. Easily establish a wireless connection for seamless internet access.
If you’re experiencing issues while connecting your router to a modem wirelessly, don’t worry! We have some troubleshooting tips that can help you resolve common problems quickly. Check out the following solutions:
- Power cycle both the router and modem: Turn off both devices, unplug them from the power source, wait for about 30 seconds, and then plug them back in. This can often resolve connectivity issues.
- Check the wireless signal strength: Ensure that the router and modem are in close proximity to each other. Avoid obstructions like walls or furniture that can weaken the wireless signal. Also, make sure that both devices have their wireless antennas properly positioned and extended.
- Verify the SSID and password: Double-check that you are connecting to the correct wireless network by confirming the SSID (network name) and password. It’s easy to mistype or confuse them, so ensure accuracy.
- Disable conflicting devices: Sometimes, other wireless devices or appliances in your home can interfere with your wireless connection. Try turning off or moving away from devices like cordless phones, baby monitors, or microwave ovens to see if it improves the signal.
- Update router firmware: Occasionally, outdated router firmware can cause connectivity issues. Visit the manufacturer’s website to download and install the latest firmware for your router model.
- Reset router settings: If all else fails, you may need to reset your router to its factory settings. Find the reset button on the router, usually located on the back or bottom, and press it with a pin or small tool. Note that this will reset all settings, so be prepared to reconfigure your network.
- Contact your ISP: If none of the above solutions work, it’s possible that the problem lies with your internet service provider. Contact their customer support for assistance in troubleshooting the connection.
These troubleshooting tips should help you overcome common issues while connecting your router to a modem wirelessly. By following these steps, you can ensure a smooth and reliable wireless network connection in no time.
Network Management And Maintenance
Connect your router to a modem wirelessly for efficient network management and maintenance. Ensure seamless internet connectivity without the hassle of cables.
Connecting a router to a modem wirelessly is a convenient way to enjoy internet connectivity without the hassle of cords and cables. However, it’s important to understand how to manage and maintain your wireless network to ensure a smooth and reliable connection.
In this section, we will explore some key aspects of network management and maintenance to help you optimize your wireless setup.
Securing Your Network:
- Change the default login credentials of your router to protect against unauthorized access.
- Enable network encryption (such as WPA2) to secure your wireless connection.
- Regularly update your router’s firmware to ensure it has the latest security features and performance improvements.
- Create a strong and unique Wi-Fi network password to prevent unauthorized users from gaining access.
Monitoring Network Performance:
- Check your internet speed regularly to ensure you are getting the performance you’re paying for.
- Identify and resolve any connectivity issues by troubleshooting common problems like interference or signal strength.
- Monitor the devices connected to your network to identify any unauthorized or suspicious activity.
- Use network monitoring tools or router management apps to keep track of your network performance and overall usage.
Optimizing Wi-Fi Signal Strength:
- Position your router in a central location to ensure maximum coverage and signal strength throughout your home or office.
- Avoid physical obstructions like walls, large furniture, or appliances that can interfere with the Wi-Fi signal.
- Adjust the Wi-Fi channel settings on your router to minimize interference from neighboring networks.
- Consider using Wi-Fi extenders or mesh network systems to improve coverage in larger or multi-level spaces.
Managing Bandwidth:
- Prioritize critical devices or applications by enabling Quality of Service (QoS) settings on your router.
- Limit bandwidth usage for specific devices or users to prevent network congestion.
- Monitor data usage to identify any excessive or unnecessary consumption.
- Regularly review and update your network settings to adapt to changing needs or requirements.
Regular Maintenance:
- Restart your router periodically to resolve any temporary issues or glitches.
- Keep your router clean and dust-free to avoid overheating and performance degradation.
- Regularly update your router’s software and firmware for bug fixes and performance enhancements.
- Perform regular backups of your router’s settings to restore them in case of a reset or configuration change.
Whether you are a tech enthusiast or a casual user, following these network management and maintenance practices will help you maintain a reliable and secure wireless connection. By optimizing your network performance and staying proactive with maintenance, you can enjoy seamless internet connectivity and make the most out of your wireless setup.
Frequently Asked Questions For How To Connect A Router To A Modem Wirelessly
How Do I Connect My Wireless Router To My Modem Without Cable?
To connect your wireless router to your modem without a cable, follow these steps: 1. Power on your modem and router. 2. Locate the Wi-Fi settings on your modem and take note of the network name (SSID) and password. 3. On your router, find the reset button and hold it for a few seconds to reset the router to its default settings.
4. Connect your computer or smartphone to the router’s Wi-Fi network using the default network name and password. 5. Access the router’s web-based interface by typing its IP address into your browser’s address bar. 6. Follow the setup wizard to enter the necessary details, including the network name and password from your modem.
7. Save the settings, and your router will establish a wireless connection with your modem. Once completed, you will have successfully connected your wireless router to your modem without using a cable.
How Do I Setup My Wireless Router To My Modem?
To set up your wireless router to your modem, follow these steps: 1. Connect your modem to the router using an Ethernet cable. 2. Power on both devices and wait for them to fully start up. 3. Access the router’s settings by typing its IP address into a web browser.
4. Configure the wireless settings, including network name (SSID) and password. 5. Save the settings and restart the router. 6. Connect your devices to the newly created wireless network using the password.
How Do I Connect My Modem Without An Ethernet Port?
To connect your modem without an Ethernet port, use a USB-to-Ethernet adapter for a wired connection.
How Do I Connect A Router To A Modem Wirelessly?
To connect a router to a modem wirelessly, first ensure that your router and modem are both powered on. Then, access the router’s settings through a web browser using the provided IP address. Find the setup or network settings, select the wireless option, and enable Wi-Fi.
Finally, use your device’s Wi-Fi settings to connect to the newly created wireless network.
Conclusion
Setting up a wireless connection between your router and modem is a convenient way to ensure seamless internet access throughout your home or office. By following a few simple steps, you can save yourself from dealing with messy cables and enjoy the freedom of wireless connectivity.
Start by positioning your router and modem in the right locations, ensuring optimal signal strength. Then, access the router’s settings and configure the wireless connection. Make sure to choose a secure password to protect your network from unauthorized access. Finally, connect your devices to the newly created wireless network, and you’re good to go.
With a wireless connection, you can enjoy high-speed internet on multiple devices without the hassle of tangled wires. Say goodbye to wired connections and embrace the convenience of wireless networking.