How Do I Install Starlink at My Home? A Step-by-Step Guide to Installing Starlink at Home and Office
To install Starlink at your home, you need to visit the Starlink website and sign up for the service. Then, you will need to purchase the Starlink Kit, which includes a dish and a router, and follow the installation instructions provided.
Once the kit is installed, you can connect your devices to the Starlink network and start enjoying high-speed satellite internet. The availability of reliable and high-speed internet has become increasingly important in today’s digital age. Many rural areas and remote locations have limited or no access to traditional Internet service providers, making it difficult for residents to stay connected.
However, Starlink, a satellite internet service developed by Elon Musk’s SpaceX, aims to change that by providing high-speed internet access to even the most remote areas of the world. We will explore how you can install Starlink at your home and enjoy fast and reliable internet connectivity.
Introduction To Starlink
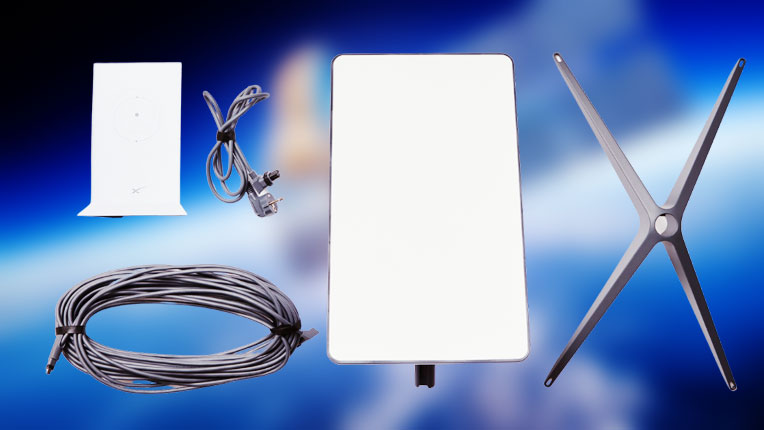
Starlink, the satellite internet system, has gained significant attention in recent times. The setup process for installing Starlink at your home is relatively straightforward. First, you would need to order a Starlink kit from their website. Once you receive the kit, it comprises a satellite dish and related equipment that you’ll need to install.
The Starlink dish requires a clear view of the sky as it communicates with the satellite constellation. After finding the perfect location, you would need to mount the dish correctly. Next, you’ll have to connect the dish to the modem provided in the kit and power it up.
The satellite dish will then establish a connection with the Starlink satellites orbiting Earth, enabling you to access high-speed internet. Overall, the installation process for Starlink is user-friendly and can be done by following the provided instructions.
Benefits Of Starlink
Starlink offers a solution for high-speed internet access in rural and remote areas. It provides enhanced connectivity for businesses and educational institutions. With Starlink, residents in rural areas can enjoy reliable internet access without the limitations of traditional infrastructure. The satellite-based network ensures a fast and stable connection, enabling users to access online resources, stream videos, and join virtual meetings seamlessly.
This technology is bridging the digital divide and opening up new possibilities for education, communication, and economic growth in underserved areas. With Starlink, installing high-speed internet at your home is now possible, regardless of your location. Experience the benefits of Starlink and enjoy a connected lifestyle in even the most remote corners of the world.
Confirming Eligibility
To install Starlink at your home, the first step is to confirm your eligibility. This involves checking the availability of Starlink in your area and verifying if your location meets the necessary requirements. It’s important to ensure that you have a clear view of the sky, as Starlink operates through a network of satellites.
Additionally, you need to have a stable internet connection and a suitable location for the Starlink dish. To check the availability, you can visit the Starlink website and enter your address or contact their customer support for further assistance. Once you confirm your eligibility and availability, you can proceed with the installation process to bring high-speed internet from Starlink to your home.
Ordering Starlink Kit
Ordering the Starlink kit online is a simple process that involves a few steps. First, visit the official Starlink website and browse through the available package options. Choose the one that suits your needs and click on it. Next, you will be directed to a page where you can enter your address to check if Starlink is available in your area.
Once confirmed, proceed to add the package to your cart and follow the prompts to complete the order. Provide the necessary personal and payment information, and review your order before finalizing it. After successful completion, you will receive a confirmation email containing the details of your order and estimated delivery date.
Receiving And Unboxing Starlink Kit
When installing Starlink at your home, the first step is to receive and unbox the kit. Make sure to carefully check for all the necessary components. This will ensure a smooth installation process. It is important to follow the guidance provided for receiving and unpacking the kit.
By doing so, you can avoid any potential issues and make the installation easier. Take your time to go through the kit and ensure that everything is in good condition. This will help you set up Starlink successfully and enjoy high-speed internet connectivity in your home.
Choosing An Installation Location
Choosing the right location for installing Starlink at your home is crucial. The first step is to identify a spot with a clear view of the sky for optimum connectivity. Make sure there are no potential obstructions, such as tall buildings or trees, that may hinder the satellite signal.
A clear line of sight will ensure a strong and stable connection. Take into consideration the position of your home and the surrounding environment. Look for an area where the satellite dish can be easily mounted and aligned. Keep in mind that the dish needs to face the sky at a specific angle to receive signals effectively.
By selecting the best installation location, you can maximize the performance of Starlink and enjoy reliable internet connectivity.
Mounting The Starlink Dish
Mounting the Starlink dish securely requires a few essential tools and materials. Firstly, you will need a sturdy mounting bracket, which will serve as the foundation for the dish. Next, gather the necessary screws and bolts to secure the bracket to a stable surface, such as your roof or a post.
It is crucial to ensure the dish has a clear and unobstructed view of the sky to receive optimal signal strength. Remember to use a level to ensure the dish mounting bracket is perfectly straight. Use a drill to create holes for the screws and bolts, making sure they are snug and secure.
Lastly, check the installation manual provided by Starlink for any additional instructions specific to your setup. With these steps and the right tools, you’ll have your Starlink dish successfully mounted in no time.

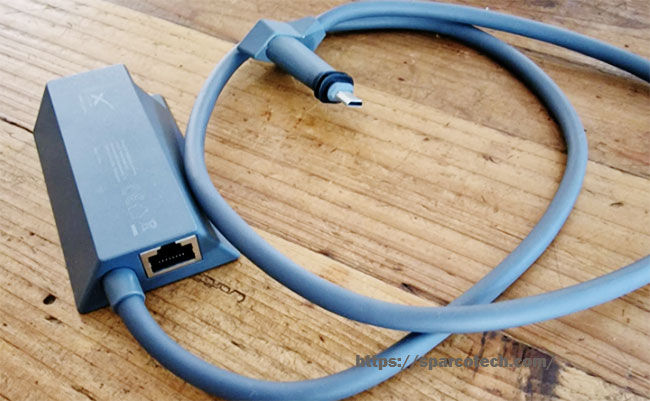
Connecting Starlink To Power And Router
To install Starlink at your home, you need to first connect it to the power source. Make sure you have a stable power supply nearby. Once that’s done, you can move on to connecting the dish to your Wi-Fi router.
This step is crucial for accessing the internet through Starlink. Ensure that your router is compatible with Starlink and follow the instructions provided by the company to establish a connection. By setting up the power source for the Starlink dish and connecting it to your Wi-Fi router, you’ll be able to enjoy high-speed internet in no time.
Activating Starlink Service
Activating the Starlink service is a simple process that begins with registration and account creation. After signing up, you will receive a confirmation email containing a link to activate your account. Click on the link and follow the step-by-step instructions provided.
You will need to provide your personal information and select a payment method for the subscription. Once your account is activated, you can proceed to order the Starlink kit. The kit includes a satellite dish, mounting hardware, and a router.
Once the kit arrives, carefully follow the installation instructions provided. Connect the satellite dish to the router and power it on. The router will establish a connection with the Starlink satellites, allowing you to access high-speed internet. Enjoy the benefits of Starlink service at your home!
Configuring Wi-Fi For Starlink
Installing Starlink at your home is a straightforward process that begins with configuring Wi-Fi. To set up the Wi-Fi network, you’ll need the Starlink router. Adjusting the Wi-Fi settings is crucial for optimal performance. By following these steps, you can ensure a smooth and reliable connection.
The first step is to connect the Starlink router to a power source and turn it on. Next, connect your device to the router’s Wi-Fi network by selecting it from the available networks. Once connected, open a web browser and enter the router’s IP address to access the settings.
Here, you can customize your Wi-Fi network name, password, and encryption type. Additionally, you can adjust other settings to enhance performance, such as selecting the optimal channel and enabling guest network access. Taking the time to configure Wi-Fi for your Starlink connection will ensure a seamless internet experience.
Troubleshooting And Support
Having issues with your Starlink installation at home? No worries, help is just a call away. If you encounter common issues like connectivity problems or slow internet speeds, reach out to customer support for troubleshooting and assistance. They are equipped to provide the necessary solutions and guide you through the process.
Whether it’s a hardware malfunction or a software glitch, the support team can help resolve the issue promptly. Don’t hesitate to access the customer support hotline for any queries or concerns you may have with your Starlink connection. Rest assured, they are there to ensure that you have a smooth and reliable internet experience with Starlink.
Enjoying High-Speed Internet With Starlink
Starlink, the revolutionary satellite internet service, offers high-speed connectivity that lets you enjoy seamless online experiences. With Starlink, you can say goodbye to slow internet and hello to lightning-fast speeds. The benefits and convenience of Starlink are countless. Imagine streaming your favorite shows in HD without buffering or delays.
Picture yourself video chatting with loved ones, no longer experiencing frustrating freezes or glitches. Need to work from home? Starlink provides a reliable connection, allowing you to participate in virtual meetings and complete tasks efficiently. With Starlink, the possibilities are limitless.
Explore new hobbies, expand your knowledge, and engage in online communities without limitations. Say goodbye to the frustrations of unreliable internet and embrace the convenience and reliability of Starlink. Upgrade your internet experience and enjoy the benefits of a fast and stable connection today.
Frequently Asked Questions On How Do I Install Starlink At My Home?
How Can I Install Starlink At My Home?
To install Starlink at your home, you need to sign up on the Starlink website and purchase the necessary equipment, including a satellite dish and modem. Once you receive the equipment, you can follow the step-by-step instructions provided to set up the dish and connect it to your internet router.
Conclusion
Installing Starlink at your home is a relatively straightforward process that can bring high-speed internet access to even the most remote areas. By following a few simple steps, such as checking for local eligibility, ordering the equipment, and installing the dish, you can enjoy the benefits of reliable internet connection.
Starlink offers a convenient and user-friendly installation process, providing detailed instructions and support along the way. With its low-latency, satellite-based internet service, Starlink provides a viable alternative to traditional internet providers. As the Starlink network continues to expand, more and more people will have the opportunity to access fast and reliable internet, regardless of their geographic location.
So, if you’re looking to improve your internet connectivity and join the Starlink revolution, now is the time to consider installing Starlink at your home.